Table of Contents
ToggleFloor and Decor has become a go-to destination for homeowners tackling kitchen backsplash projects, offering thousands of tile options at competitive prices with the advantage of seeing materials in person before buying. Whether someone’s updating a tired 1990s kitchen or finishing a full renovation, the backsplash sets the tone for the entire space, it’s where function meets personality. This guide walks through what makes Floor and Decor a solid choice, breaks down the most popular styles on their shelves, and covers the practical steps for choosing and installing tile that’ll last.
Key Takeaways
- Floor and Decor’s warehouse model offers competitive pricing on kitchen backsplash tiles ($0.50–$30+ per square foot) with same-day pickup and hands-on displays to compare materials before buying.
- Popular backsplash styles at Floor and Decor range from classic subway tile and mosaic patterns to modern glass and natural stone options, each with distinct installation requirements and maintenance needs.
- Proper layout planning, substrate preparation with backer board in wet areas, and respecting 24–48 hour mortar cure times are critical to DIY kitchen backsplash success and prevent costly mistakes.
- Grout color and type significantly impact the final look and durability—white grout creates seamless aesthetics while dark grout hides stains, and epoxy grout resists mildew better than cement grout.
- A standard 30-square-foot kitchen backsplash project takes one weekend with material costs between $50–$400, making it an achievable and high-impact DIY upgrade when proper installation steps are followed.
Why Choose Floor and Decor for Your Kitchen Backsplash
Floor and Decor operates on a warehouse-style model that keeps costs lower than traditional tile showrooms. Shoppers walk out with materials the same day instead of waiting weeks for special orders, which speeds up project timelines considerably.
The selection spans ceramic, porcelain, natural stone, glass, and metal tiles in formats from tiny penny rounds to large-format slabs. Most stores stock full displays with backsplash mockups installed at eye level, letting customers see how light plays off glass mosaics or how subway tiles look with different grout colors. That hands-on experience beats scrolling through product photos online.
Pricing runs competitive, basic 3×6-inch subway tiles start around $0.50–$1.50 per square foot, while premium glass mosaics and natural stone can reach $15–$30 per square foot. The company frequently runs promotions, and their bulk purchasing power keeps even specialty items accessible for DIY budgets. Pro tip: always buy 10–15% extra to account for cuts, breakage, and future repairs.
Floor and Decor’s staff typically includes former installers and contractors who can answer technical questions about tile thickness, substrate requirements, and whether a particular stone needs sealing. They’re not on commission, so advice tends to be straightforward. Most locations also carry all the ancillary materials, thin-set mortar, grout, spacers, backer board, and sealers, so one trip covers the entire supply list.
Most Popular Backsplash Styles at Floor and Decor
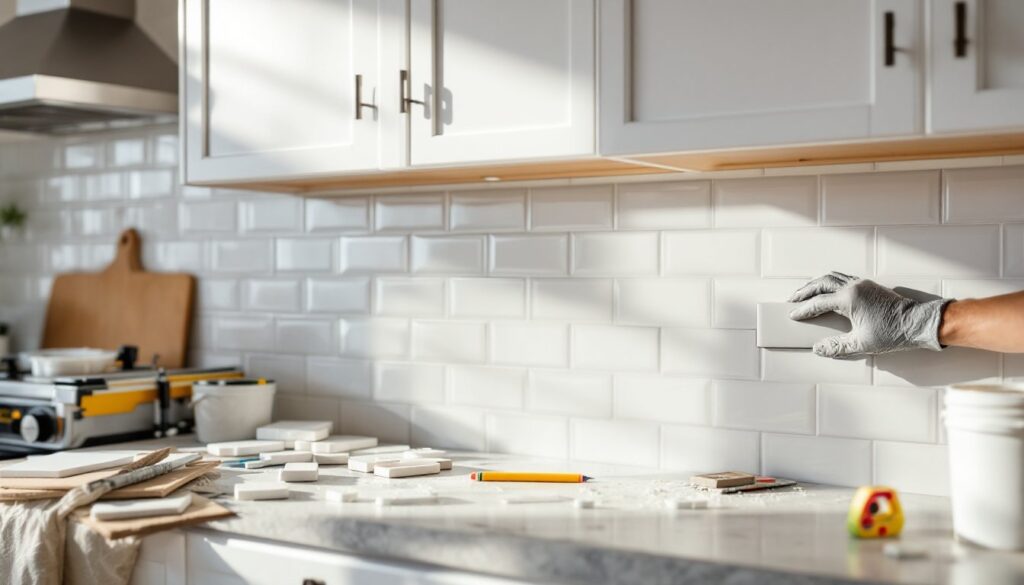
Subway Tile and Classic Patterns
Subway tile, the 3×6-inch ceramic rectangle, remains the best-seller for good reason. It fits traditional and transitional kitchens, comes in dozens of colors and finishes (glossy, matte, beveled, or flat-edge), and installs quickly with minimal waste. Standard running bond (brick pattern) is classic, but stacking tiles vertically or running them in a herringbone layout adds visual interest without extra material cost.
Floor and Decor stocks subway tile in ceramic and porcelain, with porcelain offering higher durability and stain resistance, important behind stovetops where grease splatters. Beveled subway tile creates subtle shadow lines that catch light and hide minor grout inconsistencies, a helpful feature for first-time installers.
Other classic patterns include hexagons, arabesques (lantern shapes), and pickets. These often come on mesh-backed sheets that make installation faster, though cutting around outlets and corners requires more care. A wet saw with a diamond blade is essential for clean cuts on these shapes, score-and-snap cutters won’t work.
Modern Glass and Mosaic Options
Glass tile brings depth and luminosity that ceramic can’t match. Recycled glass mosaics, often mounted on 12×12-inch sheets, create modern focal points behind ranges or sinks. Colors range from subtle frosted whites to bold cobalt blues and emerald greens. Glass reflects light beautifully, making small kitchens feel larger and brighter.
Installation requires white thin-set mortar, gray mortar telegraphs through translucent tiles and dulls the color. Glass also demands careful grouting: unsanded grout prevents scratching the tile surface. Because glass doesn’t absorb water, tiles can slip during installation, so working in small sections (about 3–4 square feet at a time) helps maintain alignment.
Metal mosaics, stainless steel, copper, or brushed aluminum, appeal to contemporary and industrial aesthetics. They’re durable and easy to clean but show fingerprints and water spots, so maintenance runs higher than matte ceramic. Exploring various kitchen backsplash ideas reveals how metal accents pair with wood cabinets or concrete countertops for dramatic contrast.
Natural stone mosaics (marble, travertine, slate) offer organic texture. Marble requires annual sealing to resist staining from acidic foods like tomato sauce or wine. Travertine’s natural pitting creates rustic character but needs more grout to fill voids. Stone typically costs $8–$25 per square foot at Floor and Decor, positioned between basic ceramic and premium glass.
How to Choose the Right Backsplash for Your Kitchen
Start by assessing the kitchen’s existing elements, cabinet color, countertop material, and flooring, since the backsplash should tie these together without competing. A busy granite countertop pairs better with simple subway tile, while solid quartz counters can handle bold patterned mosaics.
Grout color dramatically affects the final look. White grout on white subway tile creates a clean, seamless wall: dark grout adds grid definition and hides stains better over time. Floor and Decor stores have sample boards showing different grout colors with the same tile, use them. For high-traffic kitchens, epoxy grout resists staining and mildew better than standard cement grout, though it costs more and requires faster installation since it sets quickly.
Consider the height of the backsplash. Standard coverage runs from the countertop to the bottom of upper cabinets, typically 18–20 inches. Full-height backsplashes extending to the ceiling make dramatic statements and eliminate the need for paint in that zone, but they consume more material and installation time. Behind ranges, building codes don’t mandate specific backsplash heights, but extending tile 24–30 inches above the cooktop protects walls from heat and grease.
Tile size impacts both aesthetics and installation difficulty. Large-format tiles (12×24 inches or bigger) cover area quickly with fewer grout lines, creating modern, streamlined looks. They’re easier for beginners because there are fewer pieces to level. Small mosaics offer more design flexibility and work better on uneven walls since individual tiles can flex slightly, but they require patience to keep sheets aligned.
Practical durability matters. Polished marble looks stunning but etches from lemon juice and requires high maintenance. Porcelain replicating marble delivers similar aesthetics with near-zero maintenance, it won’t stain, etch, or need sealing. For families with young kids or heavy kitchen use, glazed ceramic or porcelain rated for wall applications handles daily wear without babying.
DIY Installation Tips for Floor and Decor Backsplash Tile
Backsplash installation is one of the most approachable DIY tile projects because walls aren’t load-bearing (unlike floors), and mistakes are mostly cosmetic. That said, proper prep makes the difference between a weekend warrior success and a redo.
Preparation and Materials
Ensure walls are clean, dry, and flat. Painted drywall works as a substrate for light ceramic or glass tile in dry areas. For areas behind sinks or near dishwashers, install 1/4-inch cement backer board over the drywall for water resistance and a more stable base. Fasten backer board with 1-1/4-inch cement board screws every 8 inches, then tape seams with fiberglass mesh tape and a thin skim coat of thin-set.
Gather tools before starting:
- Notched trowel (usually 1/4×1/4-inch square notch for wall tile)
- Wet saw or tile cutter (wet saws rent for $50–$75/day and handle all materials)
- Tile spacers (1/16-inch or 1/8-inch, depending on desired grout line width)
- Grout float, sponges, and buckets
- Level (a 4-foot level catches dips across multiple tiles)
- Safety gear: safety goggles, dust mask (for cutting), and rubber gloves (for grouting)
Installation Steps
-
Plan the layout. Measure the backsplash area and dry-lay tiles on the counter to determine where cuts will fall. Center the layout so any narrow cuts are symmetrical at corners or ends, avoid slivers less than 1 inch wide, which are difficult to cut and look awkward. Mark a level reference line using a straightedge or laser level: don’t trust the countertop as level.
-
Mix thin-set mortar to a peanut butter consistency. Modified thin-set works for most applications: use unmodified if installing over backer board in a shower area (not typical for backsplashes). Working in sections, apply thin-set with the flat side of the trowel, then comb through with the notched side at a 45-degree angle to create consistent ridges.
-
Set tiles firmly with a slight twist to embed them in the mortar. Insert spacers between tiles to maintain consistent grout lines. Check level and alignment frequently, once mortar starts setting (usually 20–30 minutes), adjustments get difficult. Wipe any mortar off tile faces immediately with a damp sponge.
-
Cut tiles as needed. For straight cuts, a wet saw produces clean edges. For outlets and switches, turn off power at the breaker, measure carefully, and mark cut lines on the tile face with a pencil. Make relief cuts from the edge to the cutout area, then nibble away waste with tile nippers. Outlet covers will hide minor imperfections.
-
Allow mortar to cure for 24–48 hours before grouting. This prevents tiles from shifting when pressure is applied during grout application.
-
Apply grout by holding the float at a 45-degree angle and forcing grout into joints with diagonal strokes. Work in 10-15 square-foot sections. After 10–15 minutes, when grout firms slightly, wipe tiles with a damp (not wet) sponge using circular motions to remove excess. Rinse the sponge frequently. A haze will appear as grout dries, buff it off with a clean, dry cloth after a few hours.
-
Seal grout lines after 48–72 hours with a penetrating grout sealer. This step is optional for epoxy grout but essential for cement-based grout in kitchens, where food and liquids can stain porous grout. Reapply sealer annually.
Common Mistakes to Avoid
- Skipping the layout step leads to awkward cuts in visible spots. Always dry-fit first.
- Using too much thin-set causes tiles to slide or creates uneven surfaces. The notched trowel controls the right amount, don’t add extra.
- Grouting too soon can shift tiles. Patience pays off.
- Wet sponges during cleanup dilute grout and weaken joints. Damp is the key word.
Many design-focused platforms like Remodelista feature completed backsplash projects that showcase professional finishing techniques worth studying before starting. For hands-on kitchen advice, The Kitchn offers real-world tips from home cooks who’ve tackled similar projects.
Backsplash installation typically takes a weekend: Saturday for tile setting, Sunday for grouting. For a standard 30-square-foot backsplash, material costs run $50–$400 depending on tile choice, plus $50–$100 for mortar, grout, and supplies.
Conclusion
A kitchen backsplash from Floor and Decor offers solid value, wide selection, and the chance to see and touch materials before committing. Whether someone chooses timeless subway tile or eye-catching glass mosaics, proper planning and patient installation deliver results that elevate the kitchen’s look and protect walls for years. Take time with layout, respect cure times, and don’t skip the sealer, those details separate amateur work from results worth showing off.