Table of Contents
ToggleShabby chic wall decor brings together the best of vintage romance and lived-in comfort. It’s the art of making weathered finishes, soft pastels, and salvaged finds look intentional, not accidental. This style turns imperfections into character, whether through a chippy-paint mirror frame or a set of reclaimed shutters repurposed as wall art. Unlike minimalist trends that demand pristine surfaces, shabby chic celebrates patina, texture, and the stories behind old materials. For DIYers willing to distress, layer, and curate, it’s one of the most forgiving, and rewarding, decorating approaches out there.
Key Takeaways
- Shabby chic wall decor celebrates imperfections and patina by layering soft color palettes, weathered finishes, and vintage-inspired pieces to create intentional, character-filled spaces.
- Distressing techniques like dry-brushing, selective sanding, and chalk paint application can transform budget-friendly thrift-store finds into authentic-looking shabby chic wall decor in just a few hours.
- Gallery walls and asymmetrical arrangements thrive on odd-numbered groupings, varied scales, and 2–4 inches of spacing between pieces to balance curated charm with visual breathing room.
- Reclaimed wood signs, ornate mirrors, and architectural salvage elements like old shutters and window frames serve as versatile focal points that anchor room designs while telling a story of history and authenticity.
- Lighting plays a crucial role in showcasing shabby chic details—warm-toned LED bulbs (2700K–3000K) and picture lights highlight distressed finishes and carved textures for maximum visual impact.
- Budget-conscious DIYers can achieve authentic shabby chic wall decor without vintage originals by distressing new materials with sandpaper and layering paint colors to evoke age and character.
What Makes Wall Decor Shabby Chic?
Shabby chic isn’t just about slapping white paint on everything. It’s a deliberate blend of soft color palettes (think ivory, blush, sage, and pale blue), distressed finishes, and vintage or vintage-inspired pieces. The style leans heavily on natural materials, wood, metal, linen, and avoids anything too polished or industrial.
Key characteristics include:
- Weathered wood: Real age or faux distressing with sandpaper and dry brushing.
- Ornate frames: Carved wood or resin moldings, often painted and lightly sanded to reveal layers.
- Soft, muted tones: Avoid stark white: opt for creamy off-whites, chalky pastels, or greige.
- Layered textures: Combine painted surfaces with raw wood, metal accents, or fabric elements like burlap or lace.
- Asymmetry: Gallery walls don’t need perfect alignment. Organic arrangements feel more authentic.
Authenticity matters. A genuine antique window frame carries more character than a mass-produced replica, but if you’re working on a budget, distressing new materials with chalk paint and a sanding block can achieve a convincing vintage look. The goal is to evoke history, not replicate a catalog spread.
Safety note: When working with salvaged materials, especially old paint or hardware, test for lead paint if the piece predates 1978. Use a lead test kit (available at most hardware stores) before sanding or cutting.
Best Shabby Chic Wall Decor Ideas for Every Room
Distressed Mirrors and Vintage Frames
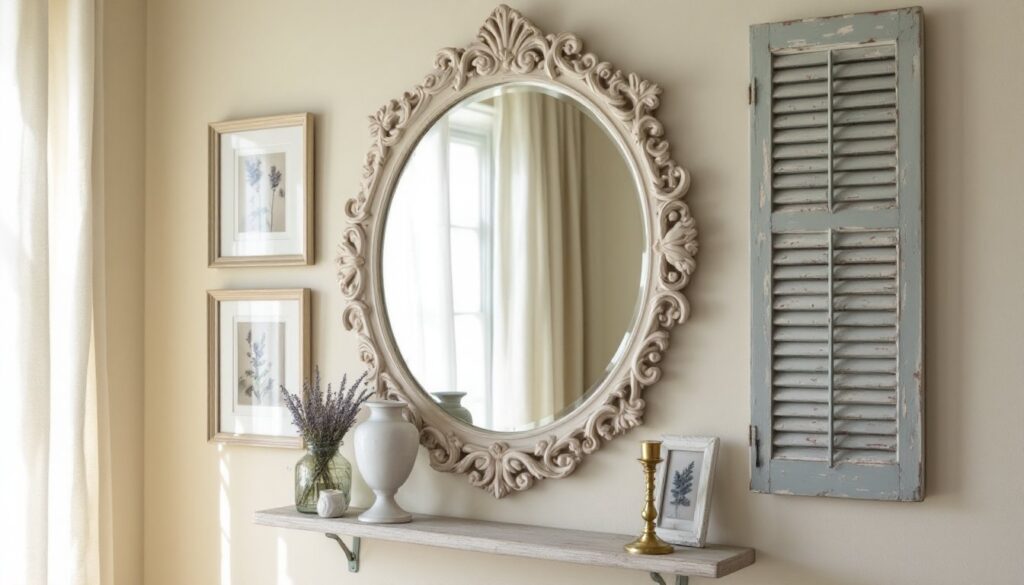
Mirrors are shabby chic workhorses. A large, distressed mirror in an ornate frame can anchor a living room or bedroom, reflecting light and making small spaces feel bigger. Look for frames with carved details, florals, scrollwork, or beaded edges. If you find a solid wood frame at a thrift store or estate sale, you’re halfway there.
To distress a mirror frame:
- Clean the frame thoroughly with TSP (trisodium phosphate) or a degreaser.
- Apply a base coat in a darker color (gray, taupe, or dusty blue).
- Once dry, apply a top coat of chalk paint in white or cream.
- After the top coat dries (usually 1–2 hours), use 120-grit sandpaper to wear through edges, corners, and high points, revealing the base color.
- Seal with clear wax or a water-based polyurethane for durability.
Vintage frames work the same way. Cluster mismatched frames in varying sizes for a gallery wall. Fill them with botanical prints, old family photos, or even fabric swatches. The frames themselves are the decor, what’s inside is secondary.
For maximum impact in living room designs, hang a statement mirror above a console table or mantel, flanked by candlesticks or small urns.
Reclaimed Wood Signs and Architectural Salvage
Reclaimed wood brings instant age and texture. Barn siding, fence pickets, or pallet wood (heat-treated, not chemically treated, look for the HT stamp) can become wall-mounted signs, shelving brackets, or even full accent walls.
To build a simple reclaimed wood sign:
- Cut boards to your desired width. A circular saw or miter saw works: joint edges if they’re rough.
- Sand lightly with 80-grit, then 120-grit sandpaper. Don’t over-sand, some roughness adds character.
- Arrange boards side by side. Secure with 1×2 furring strips screwed across the back, or use construction adhesive and clamps.
- Stencil or hand-letter a quote, name, or phrase. Use acrylic craft paint or exterior latex for durability.
- Dry-brush white or cream paint over the lettering and edges for a worn look.
- Hang with D-rings and picture wire, or mount directly with keyhole hangers.
Architectural salvage, old shutters, window frames, corbels, or ceiling tin, adds three-dimensional interest. Shutters can flank a mirror or frame a doorway. Vintage windows (glass intact or removed) make striking wall art, especially when grouped in threes. Corbels, traditionally used as shelf brackets, can be mounted as stand-alone sculptural elements.
When working with salvage, inspect for structural integrity. Rotted wood or rusted-through metal won’t hold up. A coat of clear sealer or paste wax protects finishes without altering patina.
How to Create DIY Shabby Chic Wall Decor
DIY shabby chic decor is more about technique than expensive materials. Here’s a step-by-step for creating a distressed wooden wall shelf, a versatile piece that works in kitchens, bathrooms, or entryways.
Materials:
- One 1×6 pine board, cut to desired length (24″–36″ is typical)
- Two decorative shelf brackets (metal or wood)
- Chalk paint in two colors (base and top coat)
- 120-grit sandpaper or a sanding block
- Clear paste wax or polyurethane
- Wood screws (1¼” for brackets, 2½” for wall studs)
- Level and stud finder
Tools:
- Drill/driver with bits
- Paintbrushes (2″ angled for paint, small for detailing)
- Miter saw or hand saw (if cutting board to length)
- Safety gear: goggles, dust mask
Steps:
- Cut and prep the board. If cutting, measure twice and use a miter saw for clean ends. Sand all surfaces with 120-grit to remove mill glaze and splinters.
- Apply base coat. Brush on a darker color (gray, navy, or soft green). Let dry 1–2 hours.
- Apply top coat. Use white or cream chalk paint. One coat is usually enough: it doesn’t need perfect coverage.
- Distress. Once the top coat is dry, sand edges, corners, and random spots to reveal the base color. Focus on areas that would naturally wear, edges and center.
- Seal. Rub in clear paste wax with a lint-free cloth, or brush on two coats of water-based poly. Wax gives a softer sheen: poly offers more moisture resistance (better for bathrooms or kitchens).
- Mount brackets. Use a stud finder to locate wall studs. Mark bracket positions with a level to ensure the shelf sits straight. Drill pilot holes, then drive 2½” screws into studs. If studs aren’t where you need them, use toggle anchors rated for at least 50 lbs.
- Attach shelf. Rest the board on brackets and secure from underneath with 1¼” screws.
This same distressing technique applies to picture frames, wooden signs, or furniture. The key is layering paint and selectively removing it, rushed sanding looks fake, so take your time.
For room-wide transformations that incorporate accent wall ideas, consider applying the same distressed wood technique across a full wall using shiplap or tongue-and-groove boards.
Styling Tips: Arranging Shabby Chic Wall Decor Like a Pro
Shabby chic thrives on curated clutter, but there’s a line between charming and chaotic. Follow these principles:
Use odd numbers. Groups of three or five feel more organic than pairs. Hang three vintage plates vertically, or cluster five small frames asymmetrically.
Vary scale and depth. Mix large statement pieces (a 36″ mirror, a salvaged window) with smaller accents. Layer items, hang a wreath over a mirror, or lean a small frame against the wall on a floating shelf.
Mind the spacing. In gallery walls, keep 2″–4″ between frames. Too tight feels cramped: too loose loses cohesion. Lay out the arrangement on the floor first, then transfer measurements to the wall using painter’s tape as guides.
Anchor with a focal point. Start with your largest or most ornate piece at eye level (typically 57″–60″ from the floor to the center of the piece). Build around it.
Balance color and texture. If you’re using all white or cream, add texture through woven baskets, metal sconces, or fabric elements. If you’re mixing colors, keep them in the same tonal family, blush, sage, and cream work together: hot pink and navy don’t.
Don’t overcrowd. Negative space matters. A wall packed edge-to-edge reads as clutter, not style. Leave breathing room, especially around larger pieces.
Lighting enhances texture. Install picture lights or sconces to highlight distressed finishes and carved details. Warm-toned LED bulbs (2700K–3000K) enhance the cozy, vintage vibe.
For budget-friendly inspiration and room-specific projects, many DIYers turn to resources like Addicted 2 Decorating for step-by-step makeovers and clever repurposing ideas.
Pro tip: Swap out decor seasonally. Shabby chic adapts easily, add greenery and florals in spring, swap to grain-sack textures and muted tones in fall. The base pieces (mirrors, frames, shelves) stay: the accents rotate.
Conclusion
Shabby chic wall decor rewards patience and a willingness to embrace imperfection. Whether distressing a thrift-store mirror, mounting reclaimed shutters, or building a gallery wall from salvaged frames, the style is accessible to DIYers at any skill level. Focus on layered textures, soft palettes, and thoughtful curation, and your walls will tell a story that feels both timeless and personal.